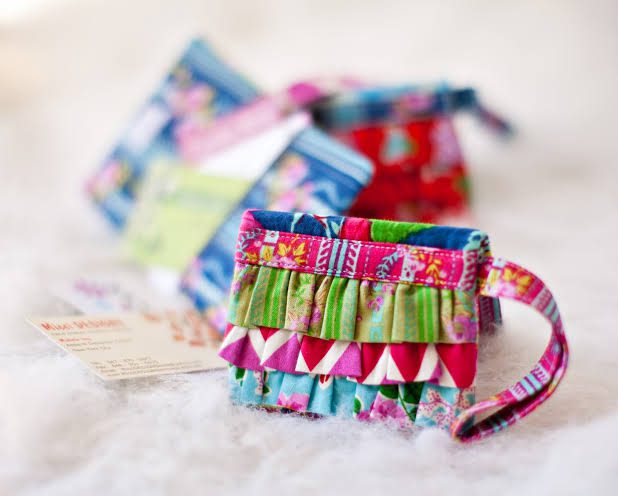
A fat quarter is a pre-cut piece of fabric commonly used in quilting and sewing projects. It’s created by cutting a half-yard of fabric horizontally and then vertically, resulting in a piece that measures approximately 18 by 22 inches. This unique cut provides versatility and convenience for crafters, allowing them to work with a variety of fabric designs without having to purchase larger quantities.
Fat quarters are often sold in bundles or individually at fabric stores and online retailers, making them accessible to quilters and sewers of all skill levels. The term “fat quarter” originated from the quilting community, where it quickly gained popularity due to its practicality and usefulness in creating diverse quilt designs.
Unlike traditional fabric cuts, such as yards or half-yards, fat quarters offer more flexibility in design and layout. Their larger size compared to standard quarter-yard cuts allows for greater creativity in piecing together different fabrics to achieve intricate patterns and color combinations. Additionally, fat quarters are ideal for small projects like patchwork, appliqué, and fabric crafts, where a variety of colors and prints are desired.
One of the main advantages of using fat quarters is their efficiency in utilizing fabric scraps and remnants. Quilters and sewers can build up a collection of fat quarters from leftover fabric pieces or purchase them specifically for projects, reducing waste and maximizing the use of materials.
This makes Fat Quarters a sustainable choice for eco-conscious crafters who want to minimize their environmental impact while indulging in their creative pursuits. Fat quarters are also favored for their convenience and affordability. Since they are precut and ready to use, crafters can skip the time-consuming process of measuring and cutting fabric, allowing them to dive straight into their projects.
Additionally, fat quarters are relatively inexpensive compared to buying fabric by the yard, making them an economical option for experimenting with new designs and techniques. This accessibility makes fat quarters accessible to a wide range of crafters, from beginners to experienced artisans, who can easily incorporate them into their projects without breaking the bank.
In addition to their practicality and cost-effectiveness, fat quarters offer endless possibilities for creativity and expression. With an array of colors, patterns, and textures available, crafters can mix and match fat quarters to create unique and personalized projects that reflect their individual style and vision.
Whether it’s a vibrant quilt, a charming tote bag, or a whimsical home decor item, fat quarters provide the foundation for countless sewing and quilting endeavors, inspiring crafters to unleash their imagination and bring their ideas to life. Furthermore, fat quarters lend themselves well to collaborative projects and exchanges within the quilting community.
Quilters often participate in “fat quarter swaps,” where they trade fabric pieces with fellow enthusiasts to expand their collections and discover new materials. These exchanges foster camaraderie and creativity among crafters, allowing them to connect with like-minded individuals and share their passion for quilting and sewing.
Read Also: How to Choose the Right Auto Shop for Your Cars
How to Select the Perfect Fabric for Your Fat Quarter Project
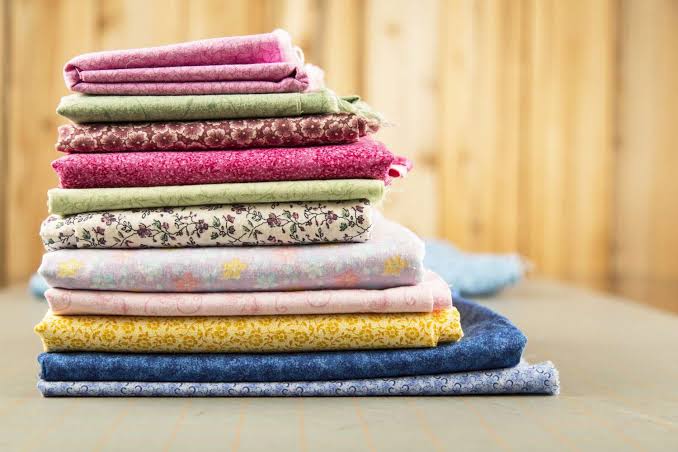
Selecting the perfect fabric for your fat quarter project is crucial to achieving the desired outcome. Whether you are quilting, sewing garments, or crafting accessories, the fabric you choose sets the tone for your project and affects its overall appearance, durability, and feel.
By considering factors such as fiber content, print scale, color palette, and intended use, you can make informed decisions when selecting fabrics for your fat quarter projects. First and foremost, consider the fiber content of the fabric. Different fibers have unique characteristics that impact how the fabric looks, feels and behaves.
Common fabric fibers include cotton, linen, polyester, silk, and blends thereof. Cotton is a popular choice for quilting and crafting due to its softness, breathability, and versatility. It is easy to work with, holds creases well, and comes in a wide range of prints and colors.
Linen, on the other hand, has a more textured and rustic appearance, making it suitable for projects with a natural or vintage aesthetic. Polyester and silk fabrics offer luxurious sheen and drape, perfect for dressmaking and special occasion projects. Consider the intended use of your project and choose fabrics that best suit your needs in terms of comfort, durability, and aesthetic appeal.
Next, pay attention to print scale and design. The scale of the print refers to the size of the motifs or patterns on the fabric. Large-scale prints can make a bold statement and add visual interest to your project, while small-scale prints are more subtle and versatile.
Consider the size of your project and the effect you want to achieve when selecting prints. For example, large-scale prints are ideal for showcasing intricate designs in quilts or statement pieces, while small-scale prints work well for background fabrics or subtle accents.
Additionally, consider the overall design aesthetic you want to create. Whether you prefer traditional, modern, floral, geometric, or novelty prints, choose fabrics that complement each other and contribute to the cohesive look and feel of your project. Color selection is another important aspect of fabric choice.
The colors you choose can evoke different moods, convey themes, and create visual impact in your project. When selecting fabrics for a fat quarter project, consider the color palette and how it reflects the desired mood or theme. You can opt for monochromatic schemes for a minimalist look, complementary colors for a harmonious effect, or contrasting colors for a bold statement.
Pay attention to color intensity and value as well. High-contrast colors can create dynamic visual interest, while low-contrast colors offer a more subtle and cohesive appearance. Experiment with different color combinations and arrangements to find the perfect balance for your project.
Additionally, consider the intended use and care requirements of your project when selecting fabrics. If you’re making a quilt that will be washed frequently, choose durable, colorfast fabrics that can withstand repeated laundering. For garments, select fabrics with appropriate drape, stretch, and breathability for the desired silhouette and comfort level.
Consider factors such as shrinkage, pilling, and ease of care when choosing fabrics for your project to ensure longevity and satisfaction with the finished product. Lastly, trust your instincts and have fun with the fabric selection process. Do not be afraid to mix and match prints, textures, and colors to create a one-of-a-kind masterpiece.
Experiment with different fabric combinations and arrangements until you find the perfect balance and harmony for your project. Remember that fabric choice is a personal preference, so trust your intuition and choose fabrics that resonate with you and bring your creative vision to life.
Read Also: How to Choose the Best Barber Shop for Your HairStyles
How to Prepare Your Fat Quarter Fabric for Crafting
Preparing your fat quarter fabric for crafting is a crucial step in ensuring the success of your project. Proper preparation can help prevent distortion, shrinkage, and other issues that may arise during the sewing or quilting process. By following these steps, you can ensure that your fat quarter fabric is clean, smooth, and ready to be transformed into beautiful creations.
1. Pre-wash the Fabric: Before starting any project, it is important to pre-wash your fat quarter fabric to remove any excess dyes, chemicals, or sizing that may be present. This helps prevent color bleeding, shrinkage, and distortion of the fabric once the project is complete. Simply machine wash the fabric in cold water with a mild detergent, then tumble dry on low heat or air dry to minimize shrinkage.
2. Press the Fabric: After washing, press the fabric with a hot iron to remove any wrinkles and creases. Use a pressing cloth or spray starch for stubborn wrinkles, especially if you are working with cotton or linen fabric. Pressing the fabric not only makes it easier to work with but also ensures more accurate cutting and piecing in your project.
3. Trim the Edges: Fat quarter fabric is typically pre-cut to a standard size of approximately 18 by 22 inches, but it’s common for the edges to be slightly uneven or frayed. Before using the fabric in your project, trim the edges to ensure they are straight and even. This will make it easier to align the fabric for cutting and piecing, resulting in more precise and professional-looking results.
4. Square Up the Fabric: In addition to trimming the edges, it’s important to square up the fabric to ensure that it is perfectly square and true to grain. Lay the fabric flat on a cutting mat or work surface, aligning the selvage edges and any wrinkles or folds. Use a rotary cutter and quilting ruler to trim off any excess fabric and create clean, straight edges. This step is especially important for quilting projects, where accuracy and precision are essential for proper piecing and assembly.
5. Consider Pre-cutting Pieces: Depending on your project, you may want to pre-cut some or all of your fat quarter fabric into smaller pieces before beginning. This can help streamline the sewing or quilting process and make it easier to work with individual components. Common pre-cut shapes include squares, rectangles, triangles, and strips, which can be used for patchwork, appliqué, or other design elements in your project.
6. Organize and Store: Once your fat quarter fabric is prepped and ready to go, it is a good idea to organize and store it in a way that makes it easy to access and use for future projects. Consider sorting your fabric by color, print, or project type and storing it in clear bins, baskets, or shelving units for easy visibility and access. You can also label your fabric stash with tags or labels to help you quickly identify and locate the perfect fabric for your next project.
The Amazing Craft Projects You Can Make with a Fat Quarter
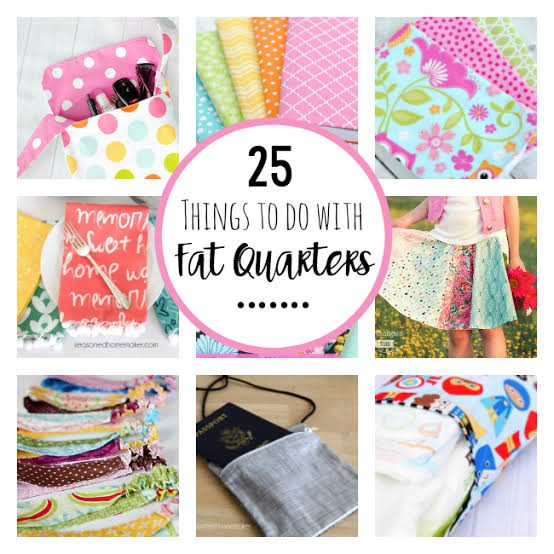
Crafting with fat quarters opens up a world of creative possibilities, allowing you to transform these versatile fabric cuts into an array of beautiful and functional projects. From quilts and bags to home decor and accessories, fat quarters are a favorite among quilters, sewers, and crafters for their convenience, affordability, and endless design options. Let’s explore some amazing craft projects you can make with fat quarters, along with tips and ideas to inspire your next creation.
1. Quilts: Quilting is where fat quarters truly shine. With just a few fat quarters and some coordinating fabric, you can create stunning quilts in a variety of styles and patterns. Whether you prefer traditional patchwork, modern improvisational piecing, or art quilting, fat quarters provide endless opportunities for creativity and expression. Experiment with different color schemes, layouts, and block designs to create a quilt that’s uniquely yours.
2. Tote Bags: Fat quarters are perfect for making tote bags of all shapes and sizes. With a couple of fat quarters and some interfacing for added structure, you can whip up stylish and functional bags for shopping, travel, or everyday use. Customize your tote with pockets, straps, and embellishments to make it uniquely yours. Consider adding features like zipper closures, magnetic snaps, or key fobs for added convenience and style.
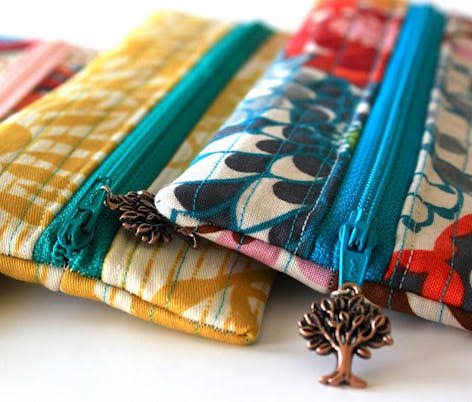
3. Zipper Pouches: Zipper pouches are another great project for fat quarters. Whether you need a coin purse, makeup bag, or pencil case, fat quarters are the perfect size for making these handy accessories. Add a zipper closure and lining fabric for a professional finish, and experiment with different shapes and sizes to suit your needs. Consider adding embellishments like appliqué, embroidery, or fabric paint to personalize your pouches.
4. Aprons: Fat quarters are also ideal for making aprons for cooking, gardening, or crafting. With just a couple of fat quarters and some coordinating fabric for straps and pockets, you can create cute and functional aprons in no time. Personalize your apron with appliqué, embroidery, or fabric paint for a custom look. Consider adding features like adjustable straps, patch pockets, or ruffled trim for added style and functionality.
5. Baby Gifts: Fat quarters are perfect for making adorable baby gifts like bibs, burp cloths, and quilts. Their small size makes them ideal for baby-sized projects, and their soft cotton fabric is gentle on sensitive skin. Mix and match coordinating prints to create a cohesive and stylish gift set for the new arrival. Consider adding features like minky backing, ribbon trim, or embroidered accents for added charm and luxury.
6. Fabric Coasters: Fabric coasters are a quick and easy project that’s perfect for using up leftover fat quarters. Simply cut squares of fabric, layer with batting for added absorbency, and quilt as desired. These fabric coasters make great gifts and are a fun way to add a pop of color to your home decor. Experiment with different quilting designs, binding techniques, and fabric combinations to create coasters that reflect your personal style and taste.
7. Fabric Bookmarks: Fabric bookmarks are another fun and easy project for fat quarters. Cut strips of fabric, add interfacing for stability, and finish with a ribbon or tassel for a decorative touch. These fabric bookmarks make great gifts for book lovers and are a fun way to use up scraps of fabric. Experiment with different fabrics, trims, and embellishments to create bookmarks that are as unique and individual as the books they hold.
8. Fabric Bunting: Fabric bunting is a festive decoration that’s perfect for parties, holidays, or everyday use. Cut triangles of fabric from fat quarters, sew onto bias tape or ribbon, and hang for instant charm. Mix and match prints and colors to match your theme or decor. Consider adding embellishments like pom-poms, ric-rac, or felt shapes for added texture and visual interest.
9. Fabric Covered Journals: Turn plain notebooks into stylish accessories with fabric-covered journals. Cut a piece of fabric slightly larger than your notebook, apply adhesive or fabric glue to the cover, and smooth the fabric in place. Trim any excess fabric and embellish with ribbons, buttons, or embroidery for a personalized touch. These fabric-covered journals make great gifts for writers, students, or anyone who loves to jot down their thoughts and ideas in style.
10. Fabric Hair Accessories: Fat quarters can also be used to make fun and colorful hair accessories like headbands, bows, and scrunchies. Cut strips of fabric, sew into tubes, and turn right side out for headbands and bows. For scrunchies, cut a strip of fabric and sew into a loop, then insert elastic and sew closed. These fabric hair accessories are a great way to add a pop of color to any outfit and are perfect for using up leftover fabric scraps.
Step-by-step Guide to Creating a Fat Quarter Craft Project
Creating a fat quarter craft project is a rewarding and enjoyable endeavor that allows you to unleash your creativity and make something beautiful with just a few simple steps. Whether you are quilting, sewing, or crafting, fat quarters provide endless possibilities for creating unique and personalized projects. Follow this step-by-step guide to bring your fat quarter craft project to life:
1. Choose Your Project: The first step in creating a fat quarter craft project is to decide what you want to make. Whether it is a quilt, tote bag, zipper pouch, or another creative project, choose a design and pattern that inspires you and matches your skill level. Consider the intended use of your project and any specific features or techniques you want to incorporate.
2. Select Your Fat Quarters: Once you have chosen your project, it is time to select your fat quarters. Consider the color scheme, print scale, and fabric content of your fat quarters, and choose fabrics that complement each other and suit the style of your project. You can purchase fat quarters individually or in pre-coordinated bundles, or you can mix and match fabrics from your stash to create a custom look.
3. Gather Your Supplies: Before you begin your project, gather all the supplies you will need. This may include additional fabric for backing or lining, interfacing or batting for added structure or warmth, thread, sewing needles or pins, scissors, rotary cutter and cutting mat, ruler, marking tools, and any other notions or embellishments required for your project.
4. Prep Your Workspace: Clear a spacious and well-lit workspace for your project. Make sure you have enough room to lay out your fabric, cutting mat, and sewing machine, and ensure that your workspace is clean and organized. Set up your sewing machine and ironing station nearby for easy access while you work.
5. Wash and Press Your Fabric: Before you start cutting and sewing, it is important to wash and press your fat quarters to remove any excess dyes, chemicals, or sizing. Machine wash your fabric in cold water with a mild detergent, then tumble dry on low heat or air dry. Once dry, press your fabric with a hot iron to remove any wrinkles and creases, and ensure that it’s smooth and ready to work with.
6. Cut Your Fabric: Using a rotary cutter, ruler, and cutting mat, carefully cut your fat quarters into the pieces required for your project. Follow the pattern instructions or measurements you’ve chosen, and take your time to ensure accuracy and precision. Trim any selvages or uneven edges, and square up your fabric pieces as needed to ensure they’re perfectly straight and true to grain.
7. Piece Your Project Together: Once your fabric pieces are cut, it is time to start piecing your project together. Whether you are sewing blocks for a quilt, assembling panels for a bag, or stitching pieces for a zipper pouch, take care to follow the pattern instructions or design layout. Pin or clip your fabric pieces together securely before sewing, and use a consistent seam allowance to ensure that your pieces fit together neatly and accurately.
8. Press Your Seams: As you sew, press your seams flat after each step to set the stitches and create crisp, professional-looking seams. Use a hot iron and press cloth to avoid scorching your fabric, and take care to press from the wrong side to prevent imprinting seam allowances on the right side of your fabric. Pressing your seams as you go will help your project lay flat and come together smoothly.
9. Add Finishing Touches: Once your project is pieced together, it is time to add any finishing touches or embellishments. This may include quilting your quilt top, adding pockets or straps to your bag, inserting a zipper or closure on your pouch, or adding decorative stitching or trim to your project. Take your time to carefully complete these final steps, as they can greatly enhance the overall appearance and functionality of your finished project.
10. Enjoy Your Finished Project: Once your fat quarter craft project is complete, take a moment to admire your handiwork and enjoy the satisfaction of a job well done. Whether you are keeping it for yourself or giving it as a gift, your finished project is a testament to your creativity and skill as a crafter. Use and enjoy your project with pride, and do not forget to share photos and inspiration with fellow crafters!
In conclusion, by following these step-by-step instructions, you can create a beautiful and unique fat quarter craft project that showcases your creativity and craftsmanship. Whether you are quilting, sewing, or crafting, fat quarters provide endless opportunities for making one-of-a-kind creations that you’ll cherish for years to come. So gather your supplies, clear your workspace, and let your imagination run wild as you bring your fat quarter craft project to life!
Read Also: How to Make DIY Stickers: Unleashing Your Creativity, One Peel at a Time

